3 ways to deploy Apache APISIX on AWS (Part 1: AWS EC2)

𝐖𝐡𝐨 𝐈 𝐚𝐦
Bobur is a developer advocate and speaker specializing in software and data engineering. With over 10- years of experience in IT, he blogs about open-source technologies and the community around them.
𝐖𝐡𝐚𝐭 𝐈 𝐝𝐨
I work with companies at different scales to build awareness, drive adoption, and engage with the community for your developer-targeted products. I also create inspiring content, design, and code use cases, projects, and demo apps to boost learning your product.
Apache APISIX offers a centralized form of API management experience with full observability, security, and flexibility when you build and scale API programs in all cloud providers. By using cloud platforms, we can get the benefit from additional resource configurations and compute capabilities. As they provide pay-as-you-go pricing with no upfront expenses, you are able to plan, build and manage your global infrastructure at a high scale.
Throughout this series of blog posts, we will go over 3 most common ways to deploy and run Apache APISIX API Gateway on one of the most comprehensive and widely used cloud computing platforms ☁️ Amazon Web Services (AWS).
We discuss how to:
- ✔️ Build and ship APISIX Docker image to AWS EC2.
- ✔️ Use Docker Compose to deploy containerized APISIX to AWS ECS.
- ✔️ Run APISIX on AWS EKS with the help of Helm.
Prerequisites
Below few required things you need to try all 3 methods of deploying Apache APISIX API Gateway to AWS.
➡️ AWS account. Set up an AWS account and create a IAM user if you haven't done yet follow the guide AWS account setting-up. ➡️ Docker Desktop - you need also Docker desktop installed locally to complete this tutorial. It is available for Windows or macOS. Or install the Docker ACI Integration CLI for Linux.
Build and ship APISIX to AWS EC2
To start with the simplest approach, in this post, we will look at how to run a single server in AWS by manually installing, running APISIX and etcd Docker containers on EC2.
AWS EC2 is a favorite product that provides scalable virtual servers in the cloud while Docker makes it easy to run multiple applications on one server instance. AWS offers many advanced tools to deploy Docker services.
Launch AWS EC2 Instance
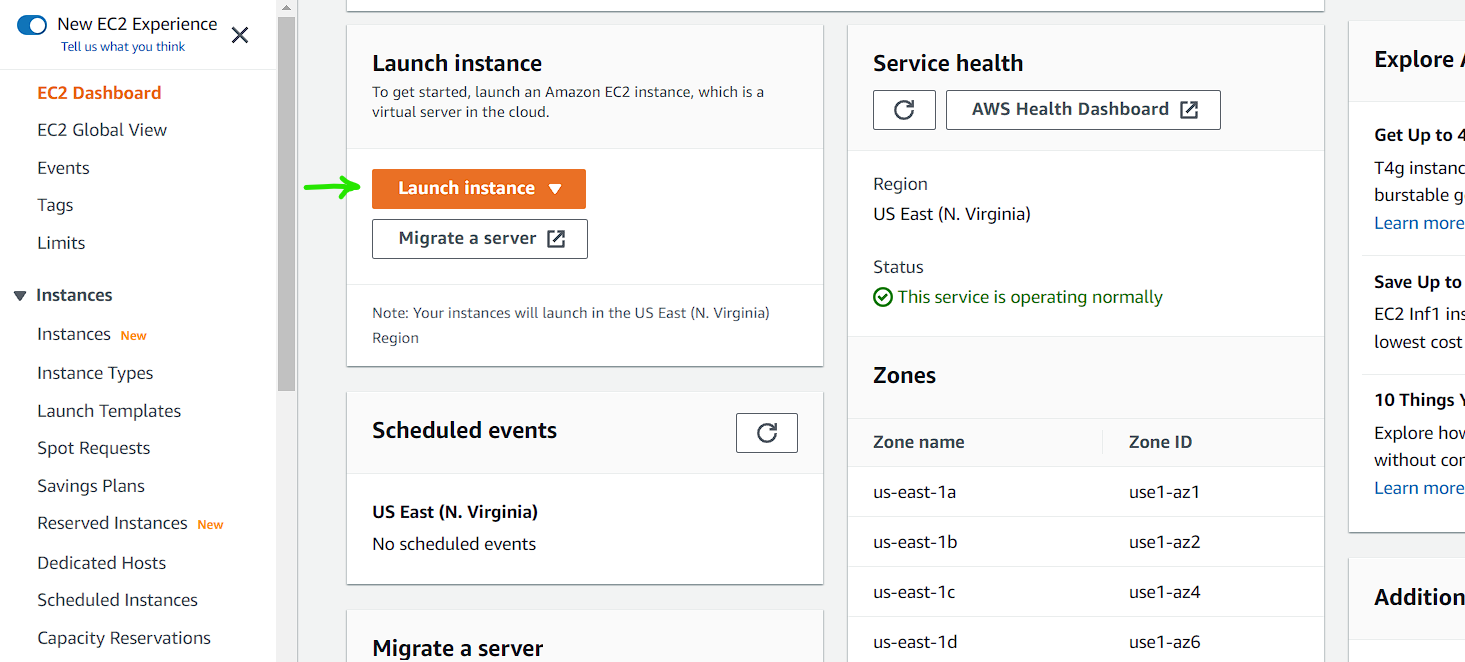
Let's get started with launching EC2 instance for Apache APISIX. Login to your AWS console and find EC2 service from the search bar and go to the EC2 dashboard. Click Launch Instance:
Next, to help you run EC2 successfully, select an Amazon Machine Image (AMI). For this example, I used Ubuntu Server with an ARM64 chip. Also, give a name for your EC2 instance.
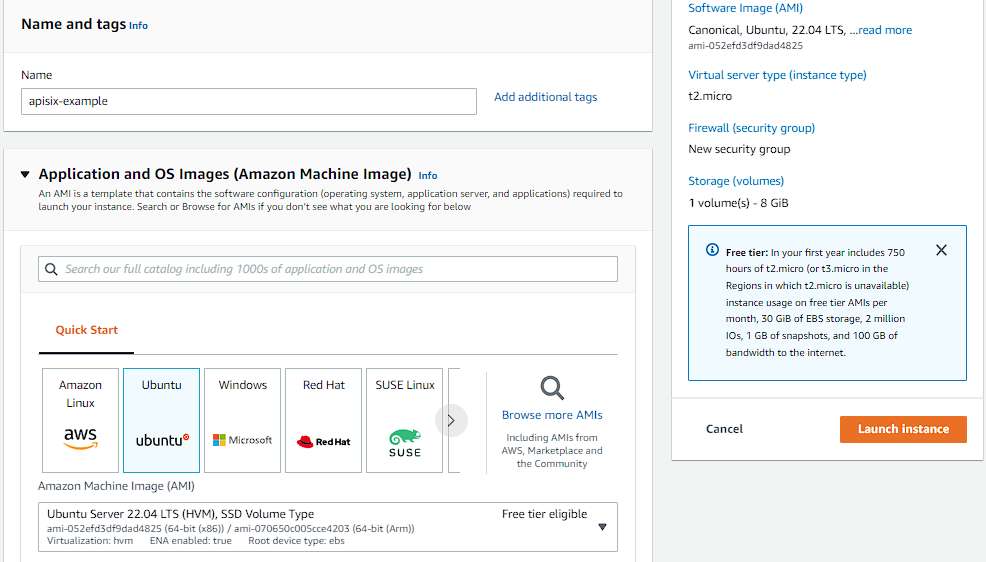
You can leave other configurations as default. For detailed instruction, follow the Get started with Amazon EC2 instance tutorial.
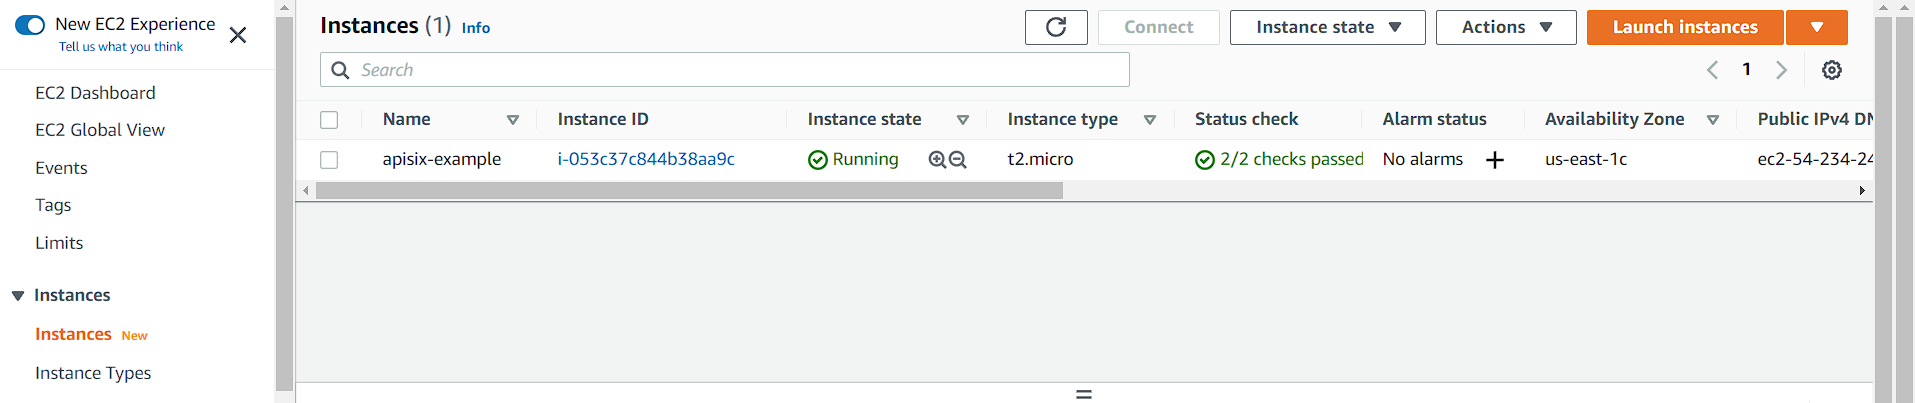
Once you push the button Launch Instance and instance creation process starts. It can take a few minutes for the instance to be ready for you to connect to it. Check that your instance has passed its status in the Status check column. Then, Hit the View Instances button to access the EC2 Instances page.
Docker and Apache APISIX installation.
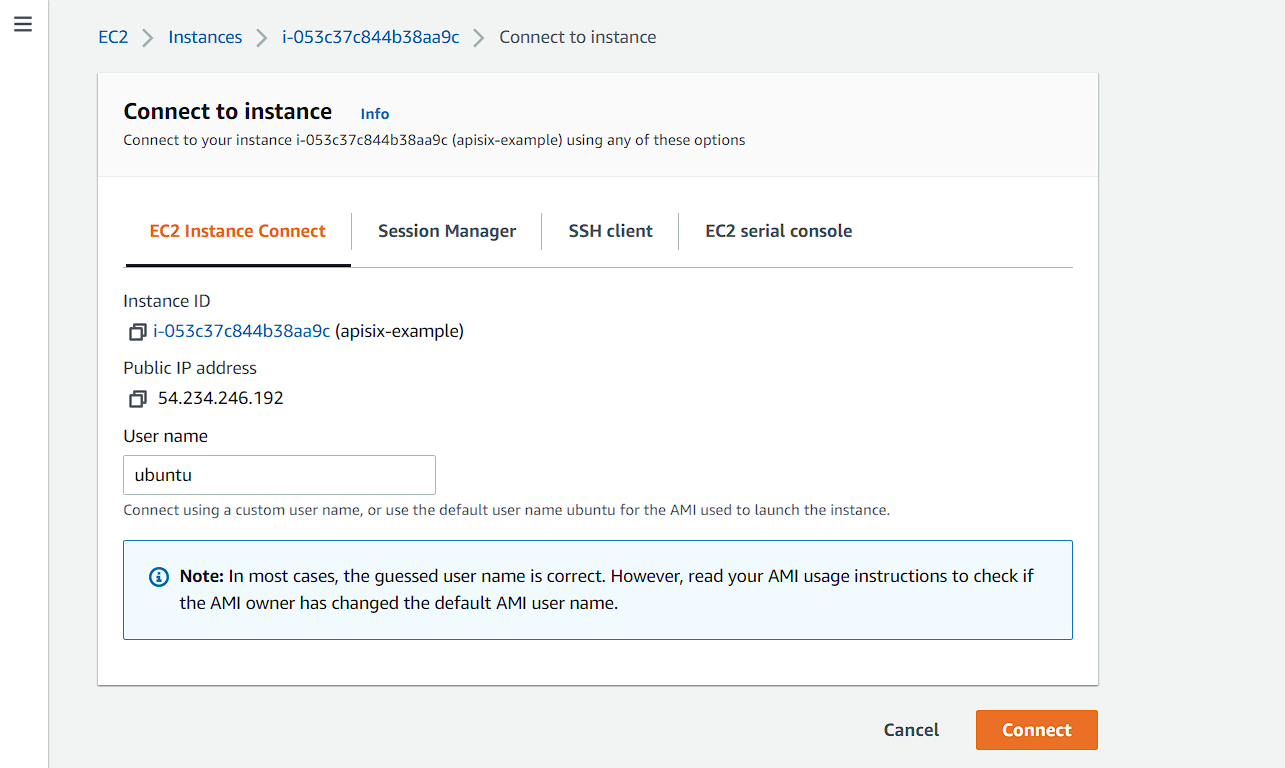
To run some commands, we need to connect to our Linux instance as the first step. There are several options you can see on Connect to EC2 instance page. For the simplicity, we use EC2 Instance Connect. It provides a simple and secure way to access your instance directly from the AWS EC2 console.
To connect to your instance using the browser-based client from the Amazon EC2 console
Open the Amazon EC2 console at https://console.aws.amazon.com/ec2/.
In the navigation pane, choose Instances.
Select the instance and choose Connect.
Choose EC2 Instance Connect.
Verify the user name and choose Connect to open a terminal window.
It opens another tab on your web browser with the terminal.
Next, we install Docker on the EC2 Instance:
sudo apt-get update && sudo apt-get install docker.io
Now it’s time to run two containers for APISIX and etcd.
APISIX uses etcd to save and synchronize configuration. Before installing APISIX, you need to install
etcdon your machine. It would be installed automatically if you choose the Apache APISIX Docker compose mode, you will learn more about on the next blog post Use Docker Compose to deploy containerized APISIX to AWS ECS.
Go ahead and install etcd first:
sudo docker run -d --name etcd -p 2379:2379 -e ETCD_UNSUPPORTED_ARCH=arm64 -e ETCD_LISTEN_CLIENT_URLS=http://0.0.0.0:2379 -e ETCD_ADVERTISE_CLIENT_URLS=http://0.0.0.0:2379 rancher/coreos-etcd:v3.4.16-arm64
☝️ Apache APISIX frequently releases the latest version of the its ARM64 image, which can be deployed with one click using Docker.
Then, we start APISIX:
sudo docker run -p 9080:9080 -p 9443:9443 --net=host --rm -d apache/apisix:2.14.1-alpine
With easy steps, we deployed Apache APISIX API Gateway to AWS EC2. The last step is to test it.
Verify Apache APISIX running
To verify if Apache APISIX is running in the cloud, we run the below curl command and check the response from APISIX's REST Admin API. You need to replace EC2_PUBLIC_IP_ADDRESS to your container instance's the public IP address or use the public DNS name.
curl "http://{EC2_PUBLIC_IP_ADDRESS}:9080/apisix/admin/services/" -H 'X-API-KEY: edd1c9f034335f136f87ad84b625c8f1'
The response indicates that APISIX is running successfully:
{
  "count":0,
  "action":"get",
  "node":{
    "key":"/apisix/services",
    "nodes":[],
    "dir":true
  }
}
Here we go, Apache APISIX is up and running in AWS EC2 and responding to your requests 👏💪.
What's next
From this stage, you can create a route, upstream and manage the traffic to your backend services with the available built-in plugins if you want to take advantage of more APISIX's features. You can provision other services on AWS with APISIX Docker compose like prometheus, grafana as well. Please stay tuned for more in the upcoming blog posts.
Recommended content
➔ Watch Video Tutorial Getting Started with Apache APISIX.
➔ Read the blog post Overview of Apache APISIX API Gateway Plugins.
➔ Read the blog post Centralized Authentication with Apache APISIX Plugins.
➔ Read the blog post API Observability with Apache APISIX Plugins.
➔ Read the blog post Run Apache APISIX on Microsoft Azure Container Instance.
Community⤵️
🙋 Join the Apache APISIX Community 🐦 Follow us on Twitter 📝 Find us on Slack 📧 Mail to us with your questions.


